This is part III of a series of ESP8266 programming tutorials on building a weather IoT station. If you missed the first parts, you can find them here: Part I and Part II. In this episode, we’re going to use the ESP8266 chip with the DHT11 sensor from part I to connect to our MQTT server from part II and publish the sensor’s data. Finally, we are going to build an iOS app to display our data.
The first challenge we are going to solve is to connect our existing ESP8266 + DHT11 weather station to our MQTT server. Since we know the IP address of our server (your local network address), we can use a compatible C library, execute the connect method to connect to our server, subscribe to a topic and publish our data. I’m going to use the “MQTT” library from the user 256dpi in the list. You can install it from within your Arduino IDE under Manage Libraries by searching for and installing MQTT by Joël Gähwiler/256dpi. Once you’ve done that, you can follow the code sample here:
#include <MQTTClient.h>
#include <ArduinoJson.h>
#include <ESP8266WiFi.h>
#include <DHT.h>

#define DHTTYPE   DHT11
#define DHTPIN    14

#define WLAN_SSID     "YourWifiSSID"
#define WLAN_PASSWORD "YourWifiPassword"
#define MQTT_SERVER_IP "YourIPAddress"
#define TEMPERATURE_TOPIC "weather/temperature"
#define HUMIDITY_TOPIC "weather/humidity"

DHT dht(DHTPIN, DHTTYPE, 11);
WiFiClient wifiClient;
MQTTClient mqttClient;

float temperature, humidity;
unsigned long previousMillis = 0;
const long interval = 30000;

void connectMQTT() {
  mqttClient.begin(MQTT_SERVER_IP, 1883, wifiClient);

  if (mqttClient.connect("weatherStation")) {
    Serial.println("Connected to MQTT broker");
    Serial.println("Subscribing to topic now");
    mqttClient.subscribe("weather/temperature");
  }
}

void setup() {
        Serial.begin(115200);
        delay(10);

        dht.begin();

        Serial.println(); Serial.println();
        Serial.print("Connecting to ");
        Serial.println(WLAN_SSID);

        WiFi.mode(WIFI_STA);
        WiFi.begin(WLAN_SSID, WLAN_PASSWORD);
        while (WiFi.status() != WL_CONNECTED) {
                delay(500);
                Serial.print(".");
        }
        Serial.println();

        Serial.println("WiFi connected");
        Serial.println("IP address: "); Serial.println(WiFi.localIP());

        connectMQTT();
}

void loop() {
  unsigned long currentMillis = millis();

  if (currentMillis - previousMillis >= interval) {
    previousMillis = currentMillis;

    humidity = dht.readHumidity();
    temperature = dht.readTemperature();
    if (isnan(humidity) || isnan(temperature)) {
      Serial.println("Failed to read from DHT sensor!");
      return;
    }

    mqttClient.publish(TEMPERATURE_TOPIC, String((int)temperature));
  }

  if (!mqttClient.connected()) {
    connectMQTT();
  }
}

void messageReceived(String topic, String payload, char * bytes, unsigned int length) {
  Serial.println(topic);
  Serial.println(payload);
}
So what did we code? Let’s focus on the methods first. Compared to what we did in part I of this series, we’ve included the MQTTClient header file so we can use the MQTT library. This gives us the MQTTClient object that we can instantiate and then set up with its own begin() method. The begin method takes your MQTT’s server IP address and ESP8266 WiFiClient as arguments. After this initial setup, we can tell the MQTTClient to connect to the server and subscribe to a topic of our choosing based on the success of the connection. That is all we need for the setup, so let’s look at the loop() method to see what we have to execute regularly to send data to our MQTT server.
Related: ESP8266 Programming – Building An IoT Weather Station Part I
In the loop function, we have to read the sensor data from our DHT11 sensor. We do this only if our preset interval is over to ensure we don’t do this too often. If we do, we’ll eventually run into problems. Once we gathered the data, it is sent off to the server via the publish() method. That is all there is for the loop() function. Outside of that, we will have to add an interface function from our MQTTClient library. That’s the messageReceived() function that would be triggered if we received MQTT messages.
Pretty straight forward, isn’t it?
If you upload your updated sketch to your ESP8266 and your server is running, you should see incoming data. To check the data you’re receiving, run mosquitto_sub -v -t 'weather/temperature' in a new terminal window on the same machine that is running your MQTT server.
Next, we’re going to display our data in a small iOS app.
First, create a new iOS project in Xcode; make it a Single View Application preferably in Objective-C, as that’s what I’m going to use, and save the project. Again, we’re going to use a MQTT library to make the connection. I’ve used this library in the past, and it worked well. You can either add it via Carthage or CocoaPods; instructions on how to add the library to your project can be found on the library’s GitHub page. For simplicity, I use CocoaPods.
Once the library is installed and available within your project, drag two/four labels onto your view and connect the labels with your ViewController.
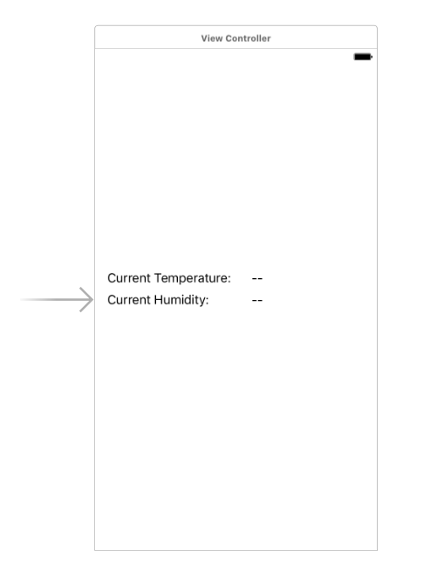
And then add your code as follows in the implementation of your ViewController:
import "ViewController.h"
import <MQTTClient/MQTTClient.h>
@interface ViewController ()
@property (weak, nonatomic) IBOutlet UILabel *tempValueLabel;
@property (weak, nonatomic) IBOutlet UILabel *humidityValueLabel;
@end
@implementation ViewController

- (void)viewDidLoad {
    [super viewDidLoad];
    MQTTCFSocketTransport *transport = [[MQTTCFSocketTransport alloc] init];
    transport.host = @"192.168.178.20";
    transport.port = 1883;
    MQTTSession *session = [[MQTTSession alloc] init];
    session.transport = transport;
    session.delegate = self;
    [session connectAndWaitTimeout:30];
    [session subscribeToTopic:@"weather/temperature" atLevel:2 subscribeHandler:^(NSError *error, NSArray *gQoss){
        if (error) {
            NSLog(@"Subscription failed %@", error.localizedDescription);
        } else {
            NSLog(@"Subscription sucessfull! Granted Qos: %@", gQoss);
        }
    }];
}

- (void)newMessage:(MQTTSession *)session
              data:(NSData *)data
           onTopic:(NSString *)topic
               qos:(MQTTQosLevel)qos
          retained:(BOOL)retained
               mid:(unsigned int)mid {
    NSString *dataString = [[NSString alloc] initWithData:data encoding:NSUTF8StringEncoding];
    NSLog(@"%@", topic);
    NSLog(@"%@", dataString);
    self.tempValueLabel.text = dataString;
}

@end
Let’s go through the important parts of the code from top to bottom:
- We’ve added the MQTT library in our ViewController
- We initialized a transport socket and set up the variables we need to supply so we can connect to the correct server
- We set the delegate so we can receive MQTT messages from subscribed topics
- We subscribed to our topic (if you’re wondering about atLevel, you can set which QoS level you want to request)
- And at last we implemented the delegate method that is called once we receive a new MQTT message on our MQTT topic that we subscribed to.
Next, build and run the project, wait until your ESP8266 publishes new data and you should be able to see that your label gets updated.
The last thing to do is to integrate the temperature data. All we have to do here is add a few simple lines.
On the ESP8266 project, we only have to add this:
mqttClient.publish(HUMIDITY_TOPIC, String((int)humidity)); For iOS we have to extend our new topic:
[session subscribeToTopic:@"weather/humidity" atLevel:2 subscribeHandler:^(NSError *error, NSArray<NSNumber *> *gQoss){}];And update the label once we receive a message on that topic:
    if (topic == @"weather/humidity") {
        self.humidityValueLabel.text = dataString;
    }
    if (topic == @"weather/temperature") {
        self.tempValueLabel.text = dataString;
    }
As you can see, MQTT is a simplistic protocol by design that is easy to use and implement. There are plenty of libraries for all common systems and technologies that will help you use your data across a variety of devices, but we are not fully done with the series yet. One thing that I really like about MQTT is the publisher/subscriber pattern where you don’t have to pull for data, but you constantly receive updates!
In the last part, we’re going to look at common use cases of MQTT in a connected home and how you can leverage it in your next project to make your home smarter. Stay tuned for the next episode in ESP8266 Programming!
