Two weeks ago, Apple held its annual WWDC keynote announcing the latest updates to its platforms and technologies. The keynote lasted more than two hours and you’d think that in that time they would have addressed all of their primary technologies. But one thing seemed to be missing…HomeKit!
Though Apple didn’t show much love to HomeKit during their Keynote, it appears they still gave it some thought leading up to WWDC 2017 as Apple quietly made a few changes.
Most notably Apple opened up its HomeKit specs outside the MFi (Made for iPhone) program. If you’re a registered developer with Apple, you will no longer have to Google the specs to rely on third-party info about HomeKit.
Next in line are the changes to HomeKit’s requirements. Up until this point, you had to have Apple’s coprocessor (aka security chip) installed in your HomeKit hardware to be able to produce HomeKit-enabled hardware. This requirement essentially removes licensing fees when releasing HomeKit hardware and makes the process easier. Additionally, authentication that was done with Apple’s coprocessor can now be done via software authentication. You still have to go through the MFi program if you intend to sell and publish HomeKit software or hardware, but you no longer have to buy Apple’s coprocessor and pay licensing fees.
Personally, I value these two changes the most and think they’ll have a great impact on the availability of HomeKit-enabled devices in the future.
Apart from that, Apple introduced changes to the feature set of its HomeKit platform adding two new product categories (sprinklers and faucets), enhancements to the sunrise and sunset scenarios, and adding temperature triggers. This all may seem like basic stuff that doesn’t change much for us developers, but it shows that Apple is aware of the huge IoT market and its potential.
To provide an example of what these changes could potentially affect, let me refer to the ESP8266-based weather station that I introduced in my latest 3-part blog post installment: part I, part II and part III.
Let’s say we wanted to sell this weather station as a real product. The hardware costs are already very minimal and the software is top notch, but now we would want to add HomeKit support so Siri could provide the temperature from our weather station when asked. If we wanted to do this before Apple’s HomeKit changes, we would have had to apply for the MFi program, acquire Apple’s coprocessors and pay to license Apple which would have probably killed our product.
Related: ESP8266 programming – building an IoT weather station
With the new changes, we could simply prototype HomeKit support ourselves. A good place to start would be this GitHub project. We can connect to the MQTT server we’ve setup before and add a config for our weather station by creating a homekit2mqtt.json file with the following contents:
{
    "TemperatureSensor": {
        "service": "TemperatureSensor",
        "name": "TemperatureSensor",
        "topic": {
            "statusTemperature": "weather/temperature"
        },
        "manufacturer": "Generic",
        "model": "TemperatureSensor"
    }
}
Now, all we have to do is to run the homekit2mqtt bridge and we can start to use our weather station with HomeKit.
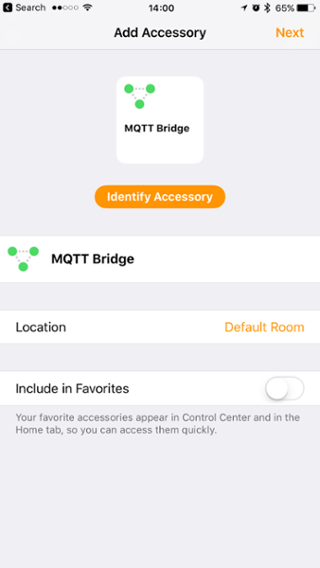
If our server runs and the connection can be made, we can start to add an accessory in HomeKit:
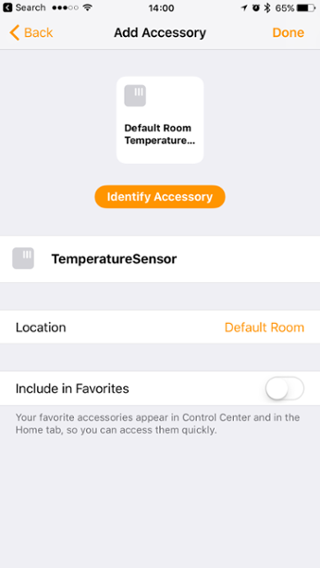
By default, the accessory is configured behind the bridge. Next is the actual temperature sensor:
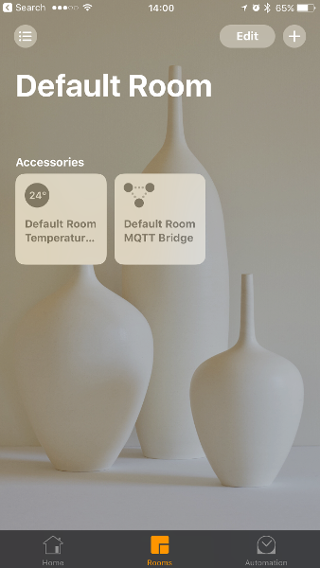
Once we’ve added that, our temperature sensor should show up in our accessory list:
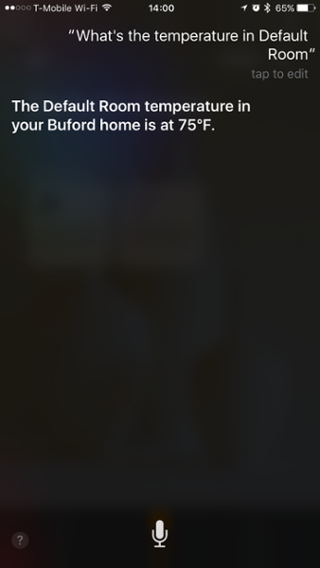
And we can ask Siri for the temperature in the room we’ve assigned the sensor to:
HomeKit integration is easy! If we truly planned to sell our weather station with HomeKit integration, we could implement HomeKit without the homekit2mqtt bridge, according to the HomeKit Specification that Apple released, and start the MFi process afterward.
Apple did a really great job making HomeKit integration easier. I’m excited to see more equipment integrate with HomeKit soon!
