This is the next piece in a series on Mobile Development for Arduino. The Internet of Things (IoT) is creating a wave of excitement in the technology sector because of its potential to serve as a boon to society at large. The economic impact of the continued development of IoT devices will most certainly generate wealth at levels not witnessed since the industrial revolution. However, as significant as the economic impacts will be, it is the social impact of this emerging paradigm that will truly be profound.
IoT will connect humanity in a tangible sense and will improve humanity’s engagement not only with the environment but each other as well. This technological revolution has created a tremendous opportunity for developers to help uplift society by developing IoT solutions that solve complex problems and mitigate the risk of performing precarious tasks.
In my first three posts “Mobile Development for Arduino Part 1, Part 2, and Part 3,” I provided an introduction to IoT software development using Arduino as a platform. Arduino is an open-source hardware solution, which gives developers an opportunity to cultivate a thorough understanding of electronics and learn how to integrate them using software. In “Mobile Development for Arduino Part 4,” we developed a prototype that automated gardening by acquiring data regarding soil moisture, temperature, humidity, sunlight and rainfall. In Part 5, we enabled our prototype to communicate remotely with an actuator via RF communication. In Part 6, we connected our prototype to the cloud via MQTT to visualize the data readings from our garden. In this post, we will expand the cloud connectivity of our prototype by enabling it to send push notifications to our mobile device.
1. Setup Firebase project
Firebase is a service offered by Google that will allow us to send push notifications from our prototype to our mobile device. The steps to create a Firebase Project that enables push notifications are as follows:
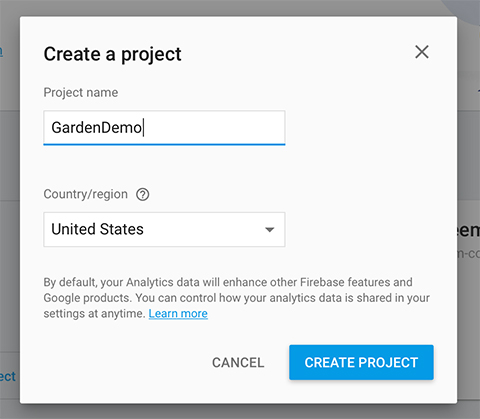
- Go to the Firebase Console, create a project, and give it a name such as “GardenDemo.”
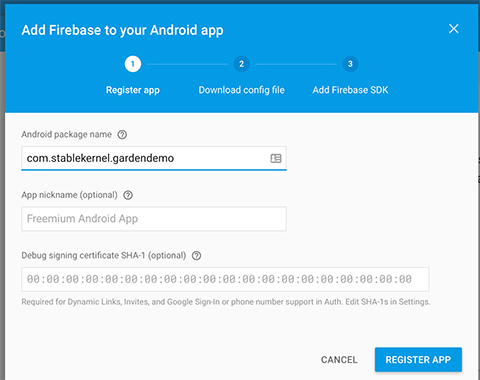
- Once your project has been created and you are redirected to the dashboard, select the “Notifications” option in the side menu, then select the Android icon in the dialog that appears.

- Enter the package name that you intend to use for your Android app (com.stablekernel.gardendemo). The package name you enter must be used when you create your Android app. Next, download the
googleservices.jsoncreated for you.
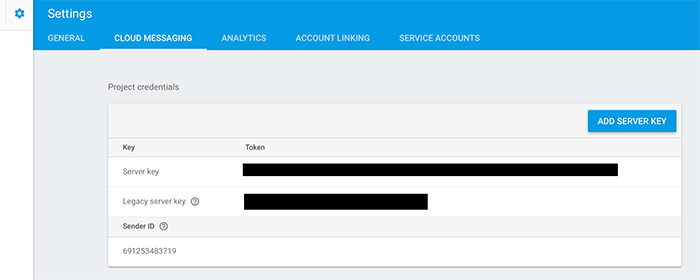
- Retrieve and save the cloud messaging server key from the Settings menu within the Firebase console. This key will be required later for the Arduino code implementation.
2. Create Android project
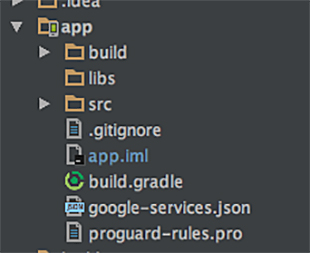
Now, that we have created a project in Firebase and downloaded the googleservices.json, we are ready to create an Android application that implements push notification functionality. This requires us to create a new project with the same package we used when creating our Firebase project (com.stablekernel.gardendemo). Once the project is created, copy the googleservices.json into the the app folder.
Lastly, in your app level build.gradle file add the google play services dependency:
dependencies {
    compile fileTree(dir: 'libs', include: ['*.jar'])
    compile "com.google.android.gms:play-services-gcm:11.0.1"
}
apply plugin: 'com.google.gms.google-services'
And in your project level build.gradle file:
buildscript {
    repositories {
        jcenter()
    }
    dependencies {
        classpath 'com.android.tools.build:gradle:2.2.0'
        classpath 'com.google.gms:google-services:3.0.0'
    }
}
3. Implement Firebase push notification service
We first need to create a Fragment with a button that retrieves our Firebase device id token when clicked. This token is used as an address identifier whenever you want to send a push notification, directing the push message to the correct recipient. To accomplish this, we will write a method that gets our token from Firebase and then sets a TextView with our token value. Also, since we need to use this token later to implement it in our Arduino code, we will trigger an email intent to save the token since it is a very long string value.
public void getTokenButtonClick() {
        String token = FirebaseInstanceId.getInstance().getToken();
        tokenTextView.setText(token);

        //Email token to ourselves
        Intent intent = new Intent(Intent.ACTION_SEND);
        intent.putExtra(Intent.EXTRA_EMAIL, new String[]{"your_email_here@gmail.com"});
        intent.putExtra(Intent.EXTRA_SUBJECT, "Arudino Garden Demo Device Id");
        intent.putExtra(Intent.EXTRA_TEXT, token);
        intent.setType("message/rfc822");
        startActivity(Intent.createChooser(intent, "Select Email Sending App :"));
}
Next, we will create a Service that listens for push notifications from Firebase. This requires us to declare the service in the Manifest.xml as shown below.
<service
            android:name=".Firebase.FirebaseMessageService">
            <intent-filter>
                <action android:name="com.google.firebase.MESSAGING_EVENT"/>
            </intent-filter>
</service>
Now, we can create our FirebaseMessageService class that extends FirebaseMessagingService. In the onMessageReceived method will we create and display a notification on our mobile device using the NotificationCompat andNotificationManager classes.
public class FirebaseMessageService extends FirebaseMessagingService {

    @Override
    public void onMessageReceived(RemoteMessage remoteMessage) {
        super.onMessageReceived(remoteMessage);

        Log.d("Msg", "Message received ["+remoteMessage+"]");

        Intent intent = new Intent(this, MainActivity.class);
        intent.addFlags(Intent.FLAG_ACTIVITY_CLEAR_TOP);
        PendingIntent pendingIntent = PendingIntent.getActivity(this, 1410, intent, PendingIntent.FLAG_ONE_SHOT);

        NotificationCompat.Builder notificationBuilder = new
                NotificationCompat.Builder(this)
                .setSmallIcon(R.mipmap.ic_launcher)
                .setContentTitle("Message")
                .setContentText(remoteMessage.getNotification().getBody())
                .setAutoCancel(true)
                .setContentIntent(pendingIntent);

        NotificationManager notificationManager = (NotificationManager) getSystemService(Context.NOTIFICATION_SERVICE);

        notificationManager.notify(NOTIFICATION_ID, notificationBuilder.build());
    }
}
The last thing we need to do is run the Android app and click the button to retrieve our device id and save it for later.
4. Implement push notifications code on Arduino
The push notification implementation on Arduino is straightforward. The first thing we need to get our server key and device id token that we saved earlier. With this in hand, we can write a method in our Transmitter sketch file that sends the push notification. Within the method, we construct a JSON String with our necessary fields and most importantly our device id. Next, we construct a web request using BridgeClient that requires our server key.
void sendPushNotification() {
    String data = "{";
    data = data + "\"to\": \"your_device_id_here\"," ;
    data = data + "\"notification\": {";
    data = data + "\"body\": \"Water Has Been Turned On\"," ;
    data = data + "\"title\" : \"Garden Alert!\" " ;
    data = data + "} }" ;
    Serial.println(data);

    if (client.connect("fcm.googleapis.com", 80)) {
        Serial.println("Connected to the server..");
        client.println("POST /fcm/send HTTP/1.1");
        client.println("Authorization: key=your_server_key_here");
        client.println("Content-Type: application/json");
        client.println("Host: fcm.googleapis.com");
        client.print("Content-Length: ");
        client.println(strlen(data));
        client.print("\n");
        client.print(data);
    }
    Serial.println("Data sent...Reading response..");
    while (client.available()) {
        char c = client.read();
        Serial.print(c);
    }
    Serial.println("Finished!");
    client.flush();
    client.stop();
}
Now, that we have our sendPushNotification method, we need to create a global boolean called sendNotification to determine whether or not we should send a push message within the loop() method. We will initialize this method as true.
boolean sendNotification = true;Within our loop() method we will conditionally call the sendPushNotification method where we check soil moisture.
if (convertToPercent(soilMoistureValue) < 20) {
      data.isOn = true;
      waterMessage = "& Water On";
      if (sendNotification == true) {
        sendPushNotification();
        sendNotification = false;
        Serial.println("Notification Sent");
        delay(1000);
      }
  } else {
      data.isOn = false;
      waterMessage = "& Water Off";
      sendNotification = true;
  }
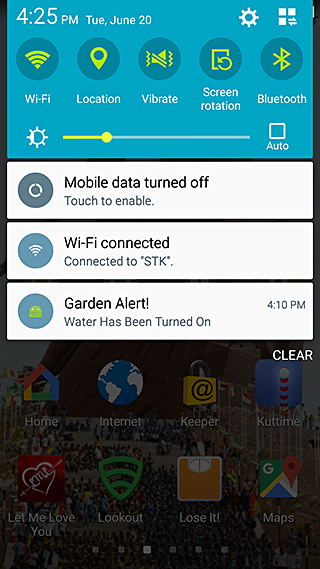
5. Send push notification
All that is left to do is turn on our Arduino, place the soil moisture sensor in dry soil and receive our push notification!
In the next installment of this Mobile Development for Arduino blog series, we will improve the functionality of our Android app to control the Arduino from a mobile device.